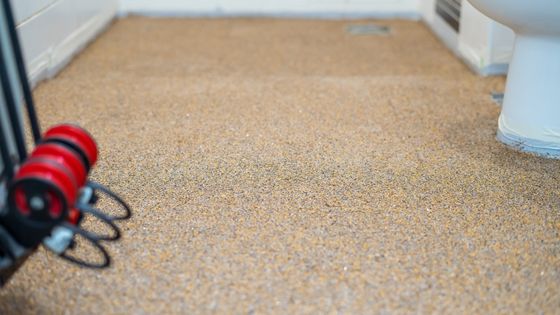
Epoxy flake flooring is the best multi-layered and advanced material with little chips incorporated during the coating process. It blends a base coat with metal, vinyl flakes, or dry paint, producing a colorful, smooth, and long-lasting finish.
It consists of four layers of coats of which two are of your choice and the other two are of polyurethane, beneficial for optimum durability. Additionally, flake flooring is available in different types of designs, colors, textures, and patterns that are customizable to match the style of your place. You can easily find top-quality epoxy flake flooring at affordable prices.
Wondering how to install it in your home, office, or garage? Read the article to learn thoroughly.
Step-By-Step Installation Of Epoxy Flake Flooring
Step 1: Preparation Of Surface
- The proper preparation of the floor surface is a must before the installation of flake flooring. This will ensure the smooth and even application of the epoxy coating. So, sanding and grinding are a must.
- You can use concrete floor grinders for the concrete polishing. However, if the surface has undergone wear and tear, use chemical cleaning products to wipe off the stains, dirt, or oil.
- It is very important to make sure no other coat is on the floor for proper epoxy flake layering. Even if you wish you can install the flake flooring over the existing one, saving you money and time.
Step 2: Thorough Cleaning Of The Surface
- After the grinding process, make sure there is no dirt or dust generated by the concrete grinder. Firstly, sweep the surface to clean off excess dust from the surface.
- Secondly, use a vacuum cleaner and mop to clean the leftover minute dust particles.
- Remember that, before you move to the next step, ensure the floor surface is dry.
- Also, keep in mind, the long-lasting effect of epoxy coating will reduce if there will be many dust particles left out. They will trap, causing inconvenience in the application of coats.
- Once your concrete surface is contamination-free, you are ready to proceed.
Step 3: Epoxy Priming
- Good-quality primers play a significant role in the proper installation of flake flooring. There is a base coat that is labeled as Part A & Part B. For mixing each component in equal proportion, follow the manufacturer’s direction and use an electric mixer for precise blending.
- Once you are ready with the base coat, start applying the primer. Typically, there are several benefits of primer among which the significant one is the ability to increase the lifespan of the surface. In addition, this versatile fluid enhances the adherence effect of the main layer of epoxy coating. Besides this, it seals the surface better, preventing the formation of bubbles.
- Most importantly, before the first application of primer, be sure the rooms are well-ventilated. Always use two coats on the surface for effective sealing.
Step 4: Grouting For Damages And Spots
- Use the epoxy grout to fill the cracks, spots, or any kind of damage on the surface.
- Use the right tool like a diamond cutter to cut the gaps. The results of which will be better adherence to grout.
Step 5: Application Of Epoxy Paint
- Again, make sure there is no dirt and dust, and if any, clean it off using an air compressor. Once the floor surface is ready, it is the best time for the application of epoxy paint.
- Also, cover the wall edge with the help of painter’s tape before applying the epoxy coating.
- The most important point to consider is covering all those areas where the chance of epoxy paint splashing is more such as windows and walls. A plastic cover is the best material to do the same.
- Now, prepare the mixture of epoxy paint using the resin and hardener in accurate proportion, following the manufacturer’s direction. Use the mixing bucket, paddlewheel mixer, and drill for the smooth blend.
- Next, apply the paint in sections which is the best method as it will make the application and drying period much easier and quicker.
Step 6: Sprinkling Of Flakes
- Once the primer dries, it is time for sprinkling multi-colored flakes using your hands. In the beginning, spread a little layer of flakes over the whole floor surface with the help of a trowel or putty knife.
- Put the chips in a small container and toss them upward by taking a handful of flakes. This trick is useful as there is an even distribution of the fragments on the whole floor surface. Also, it prevents the gathering of much quantity of chips in one spot.
- Repeat the process in an exact manner till you layer the entire floor surface with flakes.
- After completing the process, wait for 1 day to let it cure properly. When it dries, remove all the unwanted chips projecting outside. Use a floor scraper to clean them off.
- Next, sweep the blade over the surface, pressing the flakes suspended in the air onto the floor.
- You may pick up the leftover flakes or remove them using the vacuum cleaner.
- Actually, the final look of your flake flooring will totally depend on how creatively you sprinkle the flakes over the surface.
- Again, if you notice any holes or gaps, fill them with good-quality grout before the application of the second layer. Most importantly, level out the uneven surface with the help of the right tool.
Step 7: Final Topcoating
- The last step is the application of a topcoat for protection. On one layer of top coating, you can easily see the texture of the flake more prominently. If you want to lessen it, go for the second layer.
- Put the right quantity of coat on the surface. Then, spread it back and forth with the help of a squeegee equipped with a flat blade. Repeat the process while also making sure you wear spiked footwear for stepping on the floor.
- Within 4 hours your flake flooring is ready to walk on.
Summing Up
Epoxy flake flooring is the most suitable option for residential and industrial areas since the material is versatile, functional, and resists stains, scratches, chemicals, etc. Its smooth and non-slip base can support a heavy load of weights.
This is all possible with the great effort to install the epoxy flake flooring, following the directions properly. So, make sure to hire professionals for the right application and get an aesthetic look of your floors.


